Wednesday, February 27, 2013

Sweater Rescue

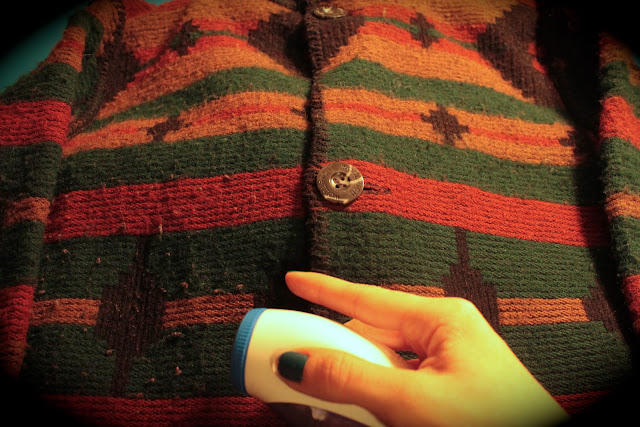
I found this amazing Woolrich blanket coat from the Salvation Army a few weeks ago, but there was an obvious problem: 
DREDED SWEATER PILLS!


Luckily a co-worker of mine (Hey Shelly!) introduced me to a battery powered fabric shaver a while back. Remembering this tool, I purchased my own from amazon.com for $10.


Using a flat surface, just place the shaver head on the fabric and move it along the section you wish to de-pill. I found that it's best to use a circular motion. Watch the magic happen.


So happy with the results!

From now on, before donating, I'm going to go through my clothes and see if there is anything I can save with this fantastic tool.

 Hmm, but by the way...did i mention the length of this coat!?


Oh, and that it's reversible!?


Working forever, see ya!

XO


Friday, February 22, 2013

So...Buttons.


One of the most simple, and inexpensive ways to dress up an old garment of clothing is by changing the buttons.  I am a huge fan of button up shirts, as well as blazers which usually have one button to close the front. 


When i went shopping to purchase some, I brought the articles of clothing with me to match up the buttons with the fabric. It also allows you to keep track of how many buttons you need to buy.


I ended up spending under $30 for all of my choices!


Now the removal and sewing begins.


You'll need a thread remover tool (about $2)


Place thread remover under the button and through the thread you wish to remove.


There will be thread left over so get out your scissors and cut it off your garment.


Find matching thread, measure it arms length apart. Insert into the needle and get your button ready.

Don't forget to knot the end of your thread.


Start from the inside of the item you are sewing the button to.


Once you the thread through the first time, place the needle between your thread and pull it through. This will make an extra knot and add security to your button.


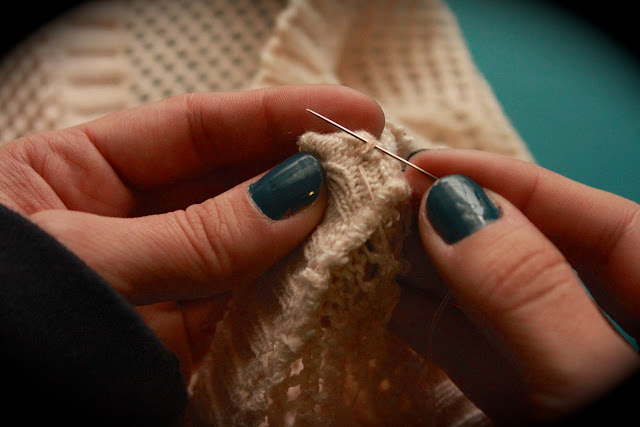
Sew your thread through the fabric about 5 times before you are ready to add the button. When you are ready thread through the button.


Sew the button through the fabric about 5 times, or until you believe it's secure.


For extra staying power thread the needle through the thread behind the button.


Knot and cut off remaining thread.


Finished product, plus the rest of my newly revamped clothing.


Last but not least, my favorite!


Now go through your closet and see what you can improve with the help of some fancy buttons.

XO

Monday, February 18, 2013

Found Objects As Necklaces

I love when anything a person wears has a story behind it. Where it came from and why they chose it to adorn there body. For me, my jewelry usually serves this purpose. I get a new ring or bracelet every time i travel, but the accessories I hold next to my heart (literally) are my necklaces made out of found objects. Each one having a past and a new present state.


This old pin used to travel with my sister everyday to high school on her backpack, as well as her first few years of college until it finally broke. Transferring to a new school as she was getting rid of old things, I found the pin and immediately remembered seeing it on school days walking to and from the bus stop. Always catching my eye, I asked her if I could have it, she of course said yes. Staring at it I thought, if not a pin how else could I wear it? Wrapping a leather cord around the top, I made my first necklace.


My Grandpa, an avid coin collector, passed away a couple of years ago. He was everyone's favorite: a kind, wonderful, gentleman. All of his Grandchildren were upset to see him go, but there's no bond like a Father/Son, and my Dad's Father was gone. Making light of the situation, and of the extensive coin collection left behind, my Dad decided to distribute one coin to each Grandchild. I got a 1971 Liberty dollar and decided that the best way to keep it close to me, was to hang it on a necklace. Doing some research, I found that a coin bezel would be the best fit. I received this one, this past Christmas from my Dad. You simply place the coin with in the frame and tighten the screw into place at the top. I used my mini screw driver with interchangeable heads.(about $6) Now I can have the memory of my Grandpa with me when ever I choose.


I find myself getting lost for hours in antique shops. The walls lined with history, as I dream up stories of who had the items all those years ago. There is one in particular in New Paltz, NY, that takes up an entire house, allowing you freedom to walk through the rooms and upstairs. Last time i took a trip there, I came back with two awesome finds. A brass painted whistle and a piece from an old drawer handle. The detail in vintage hardware is gorgeous, actually resembling jewelry, and the one I discovered with this stone is amazing. The handle was missing it's base but i assume it originally looked something like this.

Image courtesy of rubylane.com

 I paired it with a chain I had from another necklace. 

The owner of the shop told me that the whistle was most likely a child's toy from the 20's or 30's. I began to picture a little girl using it at play. Not having a large enough ring at the top to hang, I took a link from another piece of jewelry, and used my jewelry pliers (about $10) to attach it to the whistle.  I then hung it on a chain, again, that I had from another old necklace. 


 Think outside the box and search for objects that can be transformed into a necklace.

XO